

I’ve decided to start a mini contouring series, packed full of everything that you need to know to contour like a pro. I might be fairly new to contouring myself but after A LOT of research – YouTube tutorials are my new best friend, I now know all the best tips and tricks for contouring like a pro. For the first part of the contouring series, we’re going to be talking basics.
Let’s start with what contouring is, as a lot of us are unsure. Contouring means enhancing a certain area of your face in a subtle, natural-looking way. The best way to enhance your features is by creating shadows in some areas and highlighting others. When it comes to contouring success there are three essentials; the right tools, the best products, and a good technique.
The most important thing when it comes to contouring is working out your face shape. I must admit I struggled with this, so I downloaded an app – Face Shape Meter, that measured my face and worked out the shape. Your face shape is important because the contours and highlights needed for each face shape differ, as you can see below.

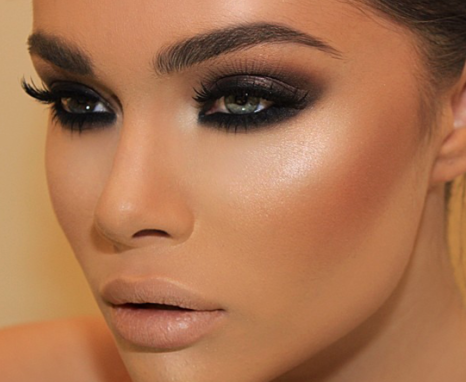
No matter what your face shape, what it’s important to remember is that contouring shouldn’t look fake. The aim is to create a natural look that highlighters the areas that the sun would normally bounce off, simply making them a little more prominent.
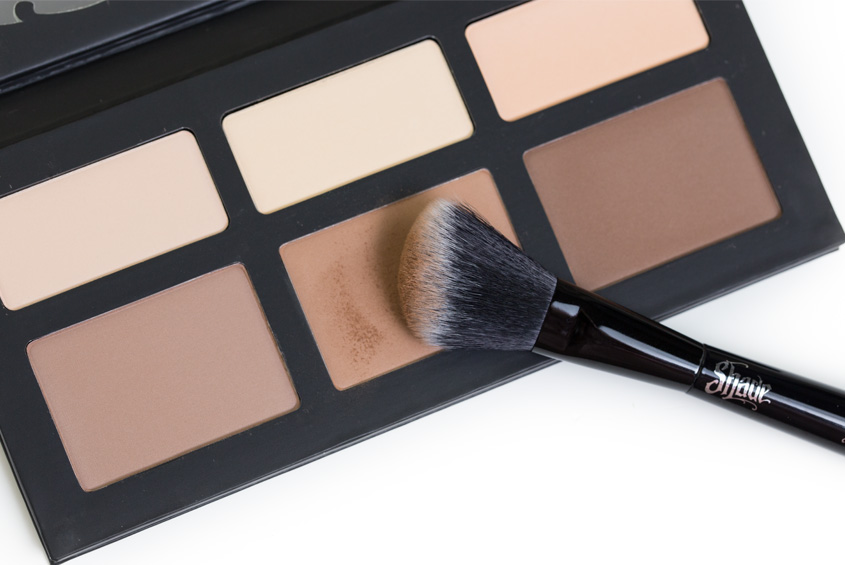
For creating shadows, always stick with matte products. Contours are meant to be matte while highlights are meant to have shimmer. You can use both cream and matte products to contour, just make sure that whatever you opt to use has zero shimmer. Personally, I love the Makeup Revolution Ultra Contour Palette because it is made up of a range of shades (Four bronzing shades and four highlighters). I would definitely recommend starting off by investing in a contouring palette so that you have a range of shades to choose from. However, if you want a single product, Benefit’s Hoola Bronzer is ideal.

It’s important to understand that a contouring product your friend swears by, may not work on you. What products work on you will depend on your skin tone – the paler you are the harder it is to find a suitable product. If all else fails, your best option is to contour using a dark-toned pressed powder. This will allow you to create shadows without making them too noticeable.
Both cream and powder products can be used to contour – powder gives a matte finish and cream a more dewy one. However, for beginners, cream-based products are best as they’re easier to blend and apply. When it comes to successful contouring, it’s all about blending. Harsh lines are a big no-no – it’s all about creating a gentle transition from one shade to another.
When it comes to highlighting, you also have the choice of cream or powder products. What you choose to use is up to you and will depend on the look you want to create. I have a range of highlighters – some cream and some powder, that I swap between as and when I want to. Personally, for successful highlighting, I would say having, at least, one cream and one powder product in your makeup bag is a must. For cream highlighters, I love Topshop Glow and No7 Instant Radiance Highlighter. I’ve also heard some amazing things about Benefit High Beam Highlighter – so this could be a good one to start off with. As for powder highlighters, my favourites have to be the Seventeen Shimmer Brick – a fantastic dupe for Bobbi Brown’s amazing shimmer brick, and Makeup Revolution Radiance Highlighter.
When it comes to contouring and highlighting, it’s important to realise that the tools you use are crucial. The best brushes for contouring are angled ones – flat brushes are also great but not as easy to use. To start off with, a large eyeshadow brush can work well, as it’s small size allows great precision. For highlighting, a small flat brush or a small blusher brush is ideal. I personally opt to use my So Eco Finishing Brush for applying highlighter as I love the smooth, flawless finish it creates.
While it’s best to stick to the contouring and strobing for your face shape, if you’re in a rush the neapolitan method can work well. The neapolitan method is a process that got its name from that strawberry, vanilla and chocolate all-in-one ice cream that we loved as children. The idea is to apply a line of highlighter along the highest point of the cheekbone, then below that to apply a small amount of blusher. Follow this by applying bronzer under the cheekbone, and you’ve mastered contouring.
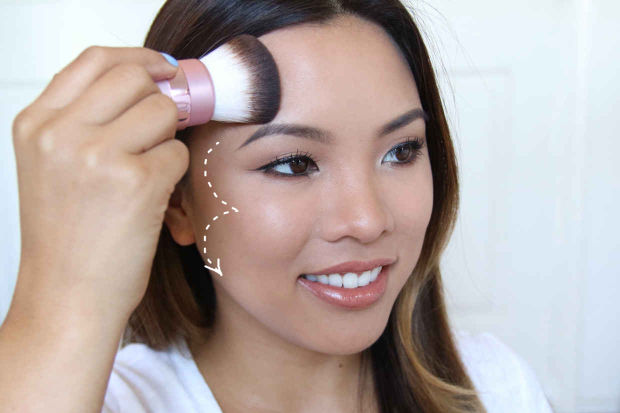
Another quick and easy contouring and highlighting method for those times when you’re in a rush is the C and E method. This is such a simple method to use that’s easy to master and most importantly, effective. To contour you need to create an E on your face and to highlight you need to create a C, that’s all there is to it. For the E, start on the forehead and sweep the bronzer under the cheekbone and then out under the chin, creating an E-shape. As for the highlighter, draw a C within the E by sweeping highlighter down from the forehead onto just above the cheekbones. Subtly blend the contour and highlights together and you’re good to go – it’s as easy as that.
There you have it, the basics of contouring. I hope the tips above have given you a better insight into contouring and highlighting and how to go about it. If you have any contouring tips, please post them in the comments – I would love to hear them.


http://axemakers.com
I am glad to be one of several visitants on this great internet site (:
, regards for putting up.